Saturday, 19 March 2016

Composting alternative techniques workshop run by Richard Main.
Richard outlined 3 alternative systems to the traditional compost heap that Judy showed us. These included;
  • Crop residue management - 'chop, drop and dig'.
  • trenching and
  • sheet mulching - a no-tillage method.
Crop residue management 
Green material (nitrogen sources) and brown material (carbon sources) in the garden are processed by cutting, chopping and digging in the plant material. This system has been practised for thousands of years and is still used today.

There are several benefits including;

  • organic matter is recycled into the soil
  • no cost - easy to implement although it does require effort...
  • all that is required is a spade - no reliance on fossil fuels
  • is an ideal technique to include as part of a four-block crop rotation
  • increases soil biological activity
  • 'waste' material is used in the garden
  • more efficient than transferring to and then from a traditional compost heap.
  • maximises nutrient and energy availability to support soil and plant health
  • reduces the need to irrigate due to the high retention of organic matter in the root zone
Crop residue management has been trialled at Lincoln University see http://www.merfield.com/research/2007/has-organics-over-hyped-the-benefits-of-compost.html
Also the September/October issue of Organic NZ, To compost or not to compost Pages 14 - 19

Trenching
Trench composting is very simple. 
Dig a trench approximately 30cm (twelve inches) deep, add roughly 10 - 15cm (four to six inches) of compostable materials, such as kitchen scraps, spent garden plants, prunings, thinnings, weeds -  and bury it with the soil you dug out of the trench.

The next step is.....well, there is no next step.

Trenching makes composting simple.

You don't have to worry about maintaining adequate moisture levels, aerating or turning the way you do with a compost pile. But here are a few more reasons to give trench composting a try:
  • It gives plants nutrition right where they need it, at the root zone. Plant roots will make their way down deeper into the soil in search of the nutrition that you have buried there. So the plant will be healthier in two ways: it will be nourished by the organic matter in the trench and it will develop a deeper, stronger root system. This means the plant will be better able to cope with dry conditions and heat.
  • It is invisible and will not produce odours. An issue some people have with compost is trying to figure out where to put the compost heap. While there are plenty of small-space composting solutions, trench composting completely eliminates this issue because you can bury waste anywhere you have an open bit of space in your garden. And, because it's buried under several inches of soil, even the smelliest kitchen waste won't be an issue.
Different Ways to Compost in Trenches
You can be as organised or as free-form with your trench composting as you'd like. There are three general methods to use in your garden. All three work very well and work on the premise that you don't want to plant directly on top of composting materials.
  • Trench Rotation
This is a method of incorporating organic matter into the garden a bit at a time while maintaining active growing and path areas. The general idea is to divide the garden into three zones:
  1. a trench composting zone, 
  2. a pathway zone, and 
  3. a growing zone. 
Each year, move the trench compost to a different part of the garden and shift the paths and growing areas as needed. By the end of three years, you've got compost under every part of your garden bed and you can start the rotation over again. If you like things very orderly, this is probably the method for you.
  • Trenching Between Rows
This works in any vegetable or annual garden in which you would plant in rows. Plant your crops as usual. In the spaces between the rows, dig a trench to toss your compostables into. Fill the trench as you add materials, and it will break down and nourish the plants nearby.
  • 'Dig & Drop'
This is the easiest way to trench compost. Collect a large bowl of material eg. vegetable and fruit peelings. Simply take it into the garden, dig a 30cm (12”) deep hole wherever you can find a spot, put in the kitchen waste and cover it over. It's fast, easy and requires very little digging.


Sheet mulching

Sheet mulching is a relatively simple technique for creating gardens rich in organic matter or dealing with extremely weedy areas. The basic concept is to place layers of a variety of nitrogen and carbon rich materials on top of the soil, allowing them to break down naturally over time –in essence, composting right in the garden itself. Sheet mulching in various forms has been practiced for hundreds of years by small farmers worldwide and has been making a come-back in North America in recent years. Sheet mulching also goes by the names of sheet composting, lasagna gardening and permaculture gardening.

Why sheet-mulch?

Sheet mulching has several useful applications for the urban environment. It is a very effective way of transforming unwanted lawn space into growing areas for vegetables, perennials, shrubs and trees. It is also an effective way of dealing with very weedy areas, as the weeds themselves are decomposed in the process, adding their nutrients to the soil. Sheet mulching is a relatively inexpensive, quick and physically less demanding way of converting lawns or dealing with weeds as it does not require digging and turning of the soil. Sheet mulching is also an excellent way to make use of large amounts of organic waste material and has the benefits of other mulching techniques such as improving water retention in the soil and the prevention of soil compaction.

What materials can be used in a sheet mulch?

Just like in a compost pile, it is important to have a balance of nitrogenous (green) and carbon-rich (brown) materials. Suitable nitrogenous materials include: grass clippings, green prunings and other yard waste; manures; coffee grounds; alfalfa meal or pellets; kelp meal; blood and bone meal, etc. Suitable carbonaceous materials include: newspapers (but not coloured flyers); corrugated cardboard (with the tape removed); dried leaves; shredded woody materials such as raspberry canes, small branches, etc.; wood chips or bark (for the top layer only); weed free straws; etc. Some finished compost is also recommended to introduce composting bacteria, fungi and other organisms into the sheet mulch. 

How do you create a sheet mulch?
Follow these basic steps:

1. Prepare the area to be mulched. Begin by trampling or slashing any taller vegetation and leave it to lie on the ground. If the ground is heavily compacted, poke holes with a garden fork every 30cm (foot) or so to a depth of 15 - 30cm (6-12 inches). Soak the area well with a garden hose or sprinkler.

2. Add soil amendments (optional). If your soil requires amendments such as dolomite lime, rock phosphate, or other minerals, add them now.

3. A layer of nitrogenous material – Add grass clippings, manure, etc. to a depth of 3 cm (1 inch). Wet down with the hose.

4. Newspaper or cardboard – Provide a ¼ inch layer of newspaper and/or corrugated cardboard, overlapping sheets by a minimum of 6 inches. This layer ensures that the weeds or grasses will not grow through the mulch. If the area is very weedy, this layer can be increased to ½ inch in thickness. Wet down thoroughly with a garden hose.

5. A layer of nitrogenous material – allow another 1-inch layer of green materials, manure, etc. You have now “sandwiched” the carbon (newspapers) between two nitrogen layers, ensuring that your soil does not become depleted of nitrogen while breaking down the newspaper. Wet down with a garden hose.

6. Additional carbon materials – add a 1-3 inch layer of leaves, straw, finely shredded branches, etc. and wet down thoroughly once again.

7. Compost layer – A 1-3 inch layer of compost will ensure that you are introducing sufficient beneficial bacteria, fungi and other microbes into the sheet mulch. This layer also allows you to plant some plants into the sheet mulch without cutting through the newspaper layer. Wet down with a garden hose.

8. Soil layer (optional) – If you have it available, you can add a 1-3 inch layer of soil on top of the compost. If you chose to add this layer, be certain that the soil is relatively free of weed seeds. Moisten with a garden hose.

9. Finishing layer – For aesthetics, moisture retention and to reduce new weeds from germinating, add a 2” cover layer of wood chips, bark mulch, or another material. Compost can also be used as a finishing layer though it will be more prone to germinating new weed seeds. Leaves can be used as an effective top layer if they are in a protected area and will not be prone to blowing around.

How do you plant into a sheet mulch?

Plant trees and shrubs prior to sheet mulching and work the sheet mulch around them. Do not allow sheet mulch materials to come into direct contact with the trunk of trees or shrubs. Perennials and annuals can be planted into the compost and soil layer or pockets of soil can be added into the sheet mulch to accommodate them. Their roots will soon penetrate through the carbon layers. It is best to transplant seedlings rather than seeding directly into the mulch as seeds can get lost in the materials.

What happens in a sheet mulch as time goes by?


The introduction of all of this organic matter creates a feast for soil microbes and soil  animals. Earthworms and other critters soon begin to feed on the newspaper and other materials, fertilising and aerating your soil in the process. In no more than two years, the newspaper and cardboard will have disappeared and the weeds will have decomposed as well. Some people chose to continually add new layers to the sheet mulch over time, employing a “no till” method of gardening.
No-tillage methods do not disturb the soil as doing so can change the nature of the soil. A way to do this effortlessly is to cut broad beans and corn off at ground level and leave the roots in the ground. This can also be done with Amaranth. 


Happy gardening!

Working Bee Sunday 13th March

Our last working bee was another great day of companionship and achievement at the Sanctuary gardens. The pile of fresh bamboo was processed into stakes and building material and the first of the winter brassica crops were planted out. General work around the gardens was also completed. Sarah led the troupe this time, as Bev and Trevor were away on a well-deserved break.
  • The working bee began with an 'alternative techniques' composting workshop by Richard Main (separate blog to follow on this). Much discussion followed on afterwards, including;
  • the intensification of the Unitec site
  • the green corridor along the river 
  • how the Sanctuary gardens have some of the best soil in the world, 2.5-metre deep (in places) volcanic loam. 
  • how the opportunity for growing food locally will be lost if the garden is built on 
  • how gardens enhance local property values 
  • Ngati Whatua seeks to build intensively to around 16.5-metre high in the area
  • how wastewater needs to be treated locally 
  • that ideally, landscape architects would be included in the initial planning 
  • design from the water up.
  • the preference for a light rail network.
  • how the Sanctuary garden is common land and a place of wellbeing - a place of healing for both Maori and Pakeha.
  • several organisations work closely in the area including the Friends of Oakley Creek and the Mt. Albert residents association.
Following are some photos from the working bee.


Richard Main and Pete discussing composting.

The huge pile of bamboo is processed by Sarah, Nigel, Robbie and Birthe.


Clare cuts up the prepared bamboo.

Preparing the cardboard boxes; Mort, Jan, Gabriel, Ainsley and Helen.

Benedicte Jenny, Marita Abbie and Karine plant out the brassica's while Matthew looks on.

Kira and Brendan planting out with Benedicte in the background.

and Liz tends the fabulous herb garden.

Happy Gardening.


Friday, 4 March 2016

Ann's fabulous chocolate zucchini cake - DELICIOUS!


At our last working-bee shared lunch, I allowed myself a slice of the deliciously moist and gleaming chocolate cake as a special treat. Mmmm-mm, it did not disappoint. So when I spied Ann collecting the remaining cake and her container, I couldn't help but ask her about the recipe. To my surprise and delight, it contains a whopping 3 cups of zucchini. Nature's bounty - no wonder it tastes so good!
Ann generously sent me a copy of her recipe as requested and here it is below. Enjoy!

Prepare a 25cm (10 inches) square baking tin or pan by lining it with two strips of baking paper.

125g butter
1 C brown sugar
1/2 C white sugar

3 eggs
2 and 1/2 cups of flour
1/2 C yogurt

1/4 C Cocoa
2 tsp baking soda
1 tsp cinnamon
1/2 tsp mixed spice
1/2 tsp salt
3 C (350g) grated zucchini
1/2 to 1 C small pieces of chocolate - optional.

Cream butter and sugars together until light and creamy. Do not hurry this step. Use a mixer or food processor.

Add the eggs, one at a time, with a spoonful of the measured flour to prevent the mixture from curdling. Add the vanilla and yogurt and mix well.

Sift the dry ingredients together. Stir into the wet mix along with the grated zucchini. Turn into the prepared baking tin. Sprinkle with the pieces of chocolate if using.

Bake at 170 C for 45 minutes, or until the centre feels firm and a skewer comes out cleanly.

YUM.

Sunday, 28 February 2016

Aaron's cooking class

Aaron Brunet fellow gardener and handily, Masterchef NZ 2013 winner, gave us a cooking class today. Check out his book too....

Aaron started by discussing the rice our stir-fry tastings were to be eaten with. He had pre-cooked the rice as follows:
1 C basmati rice
1 and 1/2 C water
3/4 C coconut cream
salt as preferred
Aaron brings the water to the boil and then sprinkles the rice into it. Cover the pan, turn the heat down low and cook for 15 minutes. Then turn off the heat and leave the rice covered to sit for another 15 minutes.
Ginger could also be added to the rice water during cooking.

This pre-cooked rice was lightly stir fried in the wok over the gas burner.

Sliced peaches with fennel seeds and kumara tips.
Slice the firm fleshed peaches into irregular shapes.
Heat the wok until it is very hot - ideally on a big gas ring.

While the wok heats make a mixture of;
2 tsp-ish of cornflour
Cold water - about 1/3 C
Salt to taste
1 tsp-ish white balsamic vinegar
Taste the sauce and adjust to your palate.
This will be used to thicken any juices left in the wok at the end of the stir-frying and gives a beautiful glaze to the vegetables.

TIP: taste all of the ingredients whilst still raw to 'understand' them. If they taste good raw, they will taste good cooked - and vice versa.

The wok is ready when it starts to smoke and a drop of water dropped on it immediately sizzles into steam. It needs to be HOT.

Once the wok is hot, add a splash of oil - today Aaron used a blend of Rice bran and Canola oil - often he uses peanut oil. Next, the allotment grown fennel seeds were added whole. If there had been a mortar and pestle handy, these would have been roughly ground before they went in.

TIP: Grinding your own seeds, be they cumin, coriander or whatever, gives a more pungent and fresh flavour & is better than pre-ground spices.

Next add the kumara tips and a splash of water to steam the vegetables.


Add the roughly chopped peaches and stir to keep everything moving, so all surfaces touch the hot wok.
Sprinkle in salt and pepper to taste.
Add more water if necessary.
Stir the cornflour mixture, which will have settled and dribble in a little to create a bubbling liquid on the bottom of the wok. Cook until everything is glossy and shiny.
Serve immediately.

Pumpkin shoots and flowers.
TIP: Pumpkin tendrils can be harvested weekly as a green crop. This also helps the fruit (pumpkins) to set.

Heat the wok until it is HOT.
Add oil and the pumpkin shoots.


Add water as it cooks and stir.
Aaron then added some of our 'gourmet garlic' - unpeeled but roughly chopped.
Add extra oil if needed. You could also add ginger at this point if liked.
Add freshly ground black pepper.
You could also add 2 - 3 freshly ground star anise at this point if liked.


Add the pumpkin flowers - these were cut in half lengthways - beautiful!
Add a splash of soy sauce.
Add a dash of the cornflour mixture to thicken the juices.
It is ready once everything has wilted - so it's fast.
Adjust to suit your palate with seasoning - salt/soy.
Chop fresh basil leaves and scatter over to serve. We served ours in the green cast iron pan below.

TIP: Young baby pumpkins can also be sliced lengthways and added to a stir-fry. Furry pumpkin stalks can also be peeled and used as an ingredient.


Lambs Quarters and allotment harvest stirfry
Heat the wok until it is HOT.
Add oil and the chopped beans.


Add sliced baby corn.
Amaranth leaves
Chopped capsicum.
Drop in the lambs quarters leaves.
Add a finely chopped chilli
Salt.
Tear in basil leaves.
Add white balsamic vinegar.
Thicken with the cornflour mixture.

Aarons advice is to try things - experiment and discover. Build up your library of tastes. For example 'Gallant soldier' weed is actually quite delicious! (See below, tucked under the pumpkin tendrils, above the secateurs).

A big thank you to Aaron for a fun, interesting and informative session.

Saturday, 27 February 2016

Working Bee - Sunday Feb28th.

After a welcome gentle downpour on Saturday, our working bee morning broke fine and clear. It was to be a short work day as we had a treat - our Fellow gardener and Masterchef 2013 winner Aaron Brunet was to give us a cooking demonstration. (See the following blog for his creative and delicious ideas).

At this time of the year, there is a lot of work that needs doing in the Sanctuary gardens to stay on top of things as weeds go to seed, compost ingredients pile up, the harvests continue and so on. Here are a few pictures of our working bee today:

There is always compost to turn at the Sanctuary garden as we recycle our 'waste' material into beautiful compost to enrich and nurture our precious soil.

Mike, Riley and Stephanie clear Twitch from the pathway.

Liz's beautiful Garlic chive border in the herb garden - so elegant.
Garlic chives can be used similarly to regular chives and add a garlic flavour and aroma to food.

John and Helen with some of Johns beautiful lettuces - brimming with nutrients and flavour.

John tends his magnificent garden. He tells me that he's now sowing seeds in the glasshouse of fennel and spinach for the next succession of planting.
Sarah shows the convolvulus who's in charge as she clears it from the mountain pawpaw.
Christine, Rosie and Jan clear the noxious weeds from the edge of the food forest. The whole food forest area is transforming into a beautiful parkland area from its original overgrown and neglected condition. Inspirational what many hands can do when working together.

And below are some of the rest of our hard working members from todays working bee (at Aarons masterclass). It was another great turnout with loads of tasks completed.


Monday, 18 January 2016

Judy's compost workshop at Working Bee - Sunday 17 January, 2016

We are lucky at the Sanctuary gardens for so many things including our wonderful compost bins, our ongoing supply of compostable waste and a great work ethic amongst our members whereby we produce beautiful compost to enrich and feed the soil.

Judy from the 'Compost Collective' and also a fellow allotment gardener, gave a workshop on compost making at our last working bee.

Compost is made by layering 'Brown/Dry' organic material with 'Green/Wet' organic material, ideally a 70% brown to 30% green ratio.

Activators are also added and these provide Potassium to the compost. Some examples of Activators are:
untreated wood ash,
blood and bone,
Comfrey,
Nettles,
Rock dust
Finished compost can also be used.
Urine - yep, you can pee on your pile!

Examples of 'Brown/Dry' organic materials are;
autumn leaves,
shredded paper including those annoying junk mail flyers(!),
newspaper,
untreated sawdust,
hay and straw.

Examples of 'Green/Wet' organic materials are;
manure,
grass clippings,
food scraps,
coffee grounds,
tree prunings,
seaweed,

Many people will struggle to achieve the 70/30 ratio so a 50/50 ratio is acceptable, although more 'Brown/Dry' will give a better compost. It's also possible to dry 'Greens' to create more 'Brown/Dry'

Recipe.
Soak cardboard boxes in water - 'Brown/Dry' organic material.


Leaves - 'Brown/Dry' organic material.


Coffee grounds 'Green/Wet' organic material - from our friendly Cafe


And all of our organic weeds, pruning etc. in the collection bay.
NB All noxious weeds have already been separated and put into black bags to rot down (see Noxious weeds blog).


VJ and John turn the compost pile, started at our December working bee, to free up the bin for our new pile.


The bin is ready to begin - Pete clears the last bits.


Firstly, a layer of sticks that are cut up so they'll compost readily. These are used to line the base of the pile to increase aeration.


Layer 1 is 'Brown/Dry' (carbon). This also helps with the aeration. Aaron loads it in.


Tear the cardboard into small strips to aid decomposition. Moisten with the hose as it goes in.


Layer 2 is 'Green/Wet'.


Chop up any big stems and roots up with loppers or a spade as it is layered in to speed up the composting process.


A sharp spade really cuts through - another reason to keep tools in good condition.


Layer 3 "Brown/Dry'.
Fluff up shredded newspaper as it goes in to avoid clumping once it is wet with the hose.


Moisten the 'Brown/Dry' Layer


Layer 4 - Activator. We used Comfrey. The pile was levelled as the organic material was added, to encourage even decomposition.


Level 5 - more 'Green/Wet'. Remember the ideal 70/30 ratio.
 

Level 6 'Brown/Dry'.
Remove any plastic tape or non-biodegradable material from the boxes before they go on the pile. Then wet it down.


Level 7 Activator - more comfrey

Level 8 'Green/Wet' - we have plenty!
We also added used coffee grounds to this layer.


Level 9 'Brown/Dry' and again we moisten it.
Level 10 Activator.
Activators can be put in at any stage if available. We added Stinging Nettles this time as they are rich in Silica. Keep wetting the pile.


Layer 11 'Brown/Dry'.
We used the potato tops that had wilted in the sack since the December working Bee, along with wetted cardboard. We continued to chop up all sticks, stems and stalks to speed up the composting process. We kept the pile flat and even in height as we worked and used the entire footprint of the compost bin.


Layer 12  - you guessed it - 'Green/Wet'.
Layer 13 Activator.
We used a bucket full of finished compost from an earlier pile this time.

To finish;
Top with a layer of "Brown/Dry and then cover the top with old carpets or sacks and wet-down again. The covers will help to retain moisture and warmth.
The compost should be turned regularly and if dry, add water. If it's wet, add dry material.
Our compost is turned each working bee (monthly).
This is last months compost, already well broken down.
 

The standard minimum temperature to kill weeds and pathogens is 65 degrees celsius over 3 x days. The quality of our compost speaks for itself but Trevor informs me the new compost pile is already up to 75 degrees C!


Tomato blight or rust are able to be neutralised by composting. This is preferable to cutting them and leaving them as an uncomposted mulch on the ground because this can spread the disease.

Composting our organic waste helps to nurture the soil by building up its organic content. It is an invaluable resource for the gardens and should be dug into the soil and not used a mulch.
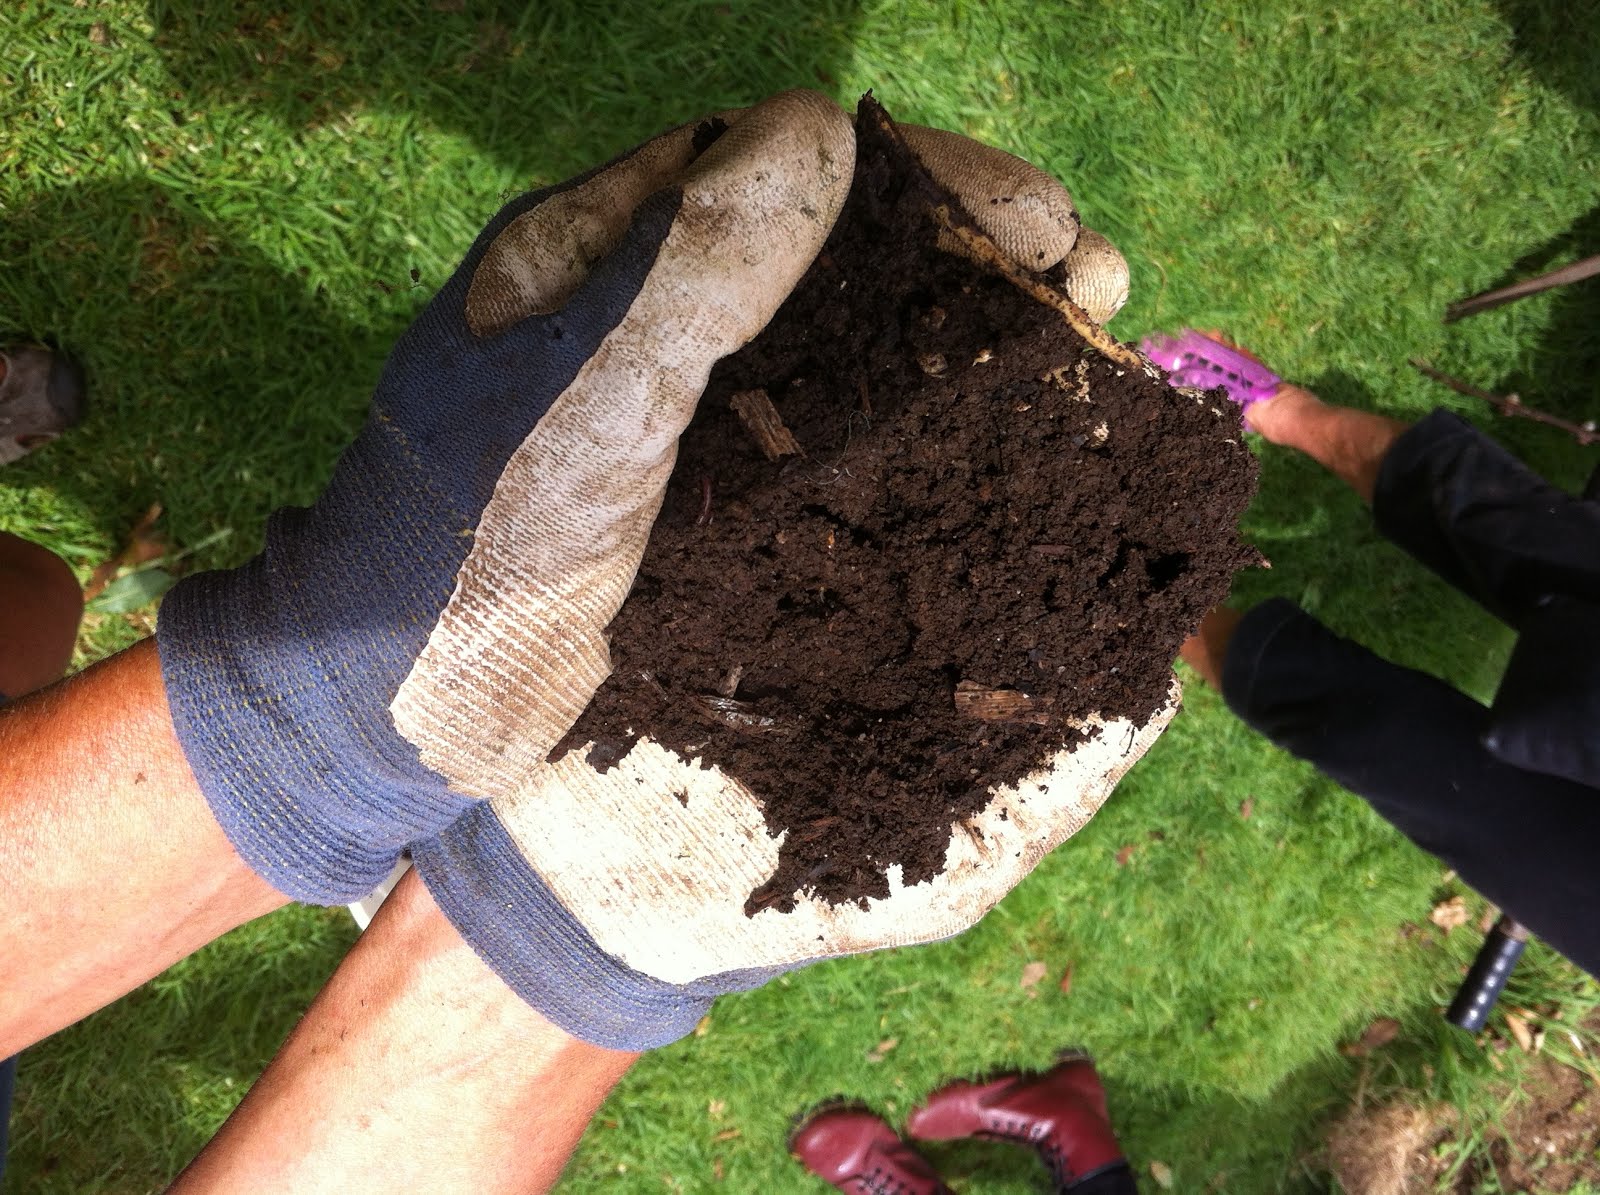
Finished compost smells sweet and will have a small and friable texture.

Thanks for your workshop Judy!