
Judy from the 'Compost Collective' and also a fellow allotment gardener, gave a workshop on compost making at our last working bee.
Compost is made by layering 'Brown/Dry' organic material with 'Green/Wet' organic material, ideally a 70% brown to 30% green ratio.
Activators are also added and these provide Potassium to the compost. Some examples of Activators are:
untreated wood ash,
blood and bone,
Comfrey,
Nettles,
Rock dust
Finished compost can also be used.
Urine - yep, you can pee on your pile!
Examples of 'Brown/Dry' organic materials are;
autumn leaves,
shredded paper including those annoying junk mail flyers(!),
newspaper,
untreated sawdust,
hay and straw.
Examples of 'Green/Wet' organic materials are;
manure,
grass clippings,
food scraps,
coffee grounds,
tree prunings,
seaweed,
Many people will struggle to achieve the 70/30 ratio so a 50/50 ratio is acceptable, although more 'Brown/Dry' will give a better compost. It's also possible to dry 'Greens' to create more 'Brown/Dry'
Recipe.
Soak cardboard boxes in water - 'Brown/Dry' organic material.

Leaves - 'Brown/Dry' organic material.

Coffee grounds 'Green/Wet' organic material - from our friendly Cafe

And all of our organic weeds, pruning etc. in the collection bay.
NB All noxious weeds have already been separated and put into black bags to rot down (see Noxious weeds blog).

VJ and John turn the compost pile, started at our December working bee, to free up the bin for our new pile.

The bin is ready to begin - Pete clears the last bits.

Firstly, a layer of sticks that are cut up so they'll compost readily. These are used to line the base of the pile to increase aeration.

Layer 1 is 'Brown/Dry' (carbon). This also helps with the aeration. Aaron loads it in.

Tear the cardboard into small strips to aid decomposition. Moisten with the hose as it goes in.

Layer 2 is 'Green/Wet'.

Chop up any big stems and roots up with loppers or a spade as it is layered in to speed up the composting process.

A sharp spade really cuts through - another reason to keep tools in good condition.

Layer 3 "Brown/Dry'.
Fluff up shredded newspaper as it goes in to avoid clumping once it is wet with the hose.

Moisten the 'Brown/Dry' Layer

Layer 4 - Activator. We used Comfrey. The pile was levelled as the organic material was added, to encourage even decomposition.

Level 5 - more 'Green/Wet'. Remember the ideal 70/30 ratio.


Level 6 'Brown/Dry'.
Remove any plastic tape or non-biodegradable material from the boxes before they go on the pile. Then wet it down.

Level 7 Activator - more comfrey
Level 8 'Green/Wet' - we have plenty!
We also added used coffee grounds to this layer.


Level 9 'Brown/Dry' and again we moisten it.
Level 10 Activator.
Activators can be put in at any stage if available. We added Stinging Nettles this time as they are rich in Silica. Keep wetting the pile.

Layer 11 'Brown/Dry'.
We used the potato tops that had wilted in the sack since the December working Bee, along with wetted cardboard. We continued to chop up all sticks, stems and stalks to speed up the composting process. We kept the pile flat and even in height as we worked and used the entire footprint of the compost bin.

Layer 12 - you guessed it - 'Green/Wet'.
Layer 13 Activator.
We used a bucket full of finished compost from an earlier pile this time.
To finish;
Top with a layer of "Brown/Dry and then cover the top with old carpets or sacks and wet-down again. The covers will help to retain moisture and warmth.
The compost should be turned regularly and if dry, add water. If it's wet, add dry material.
Our compost is turned each working bee (monthly).
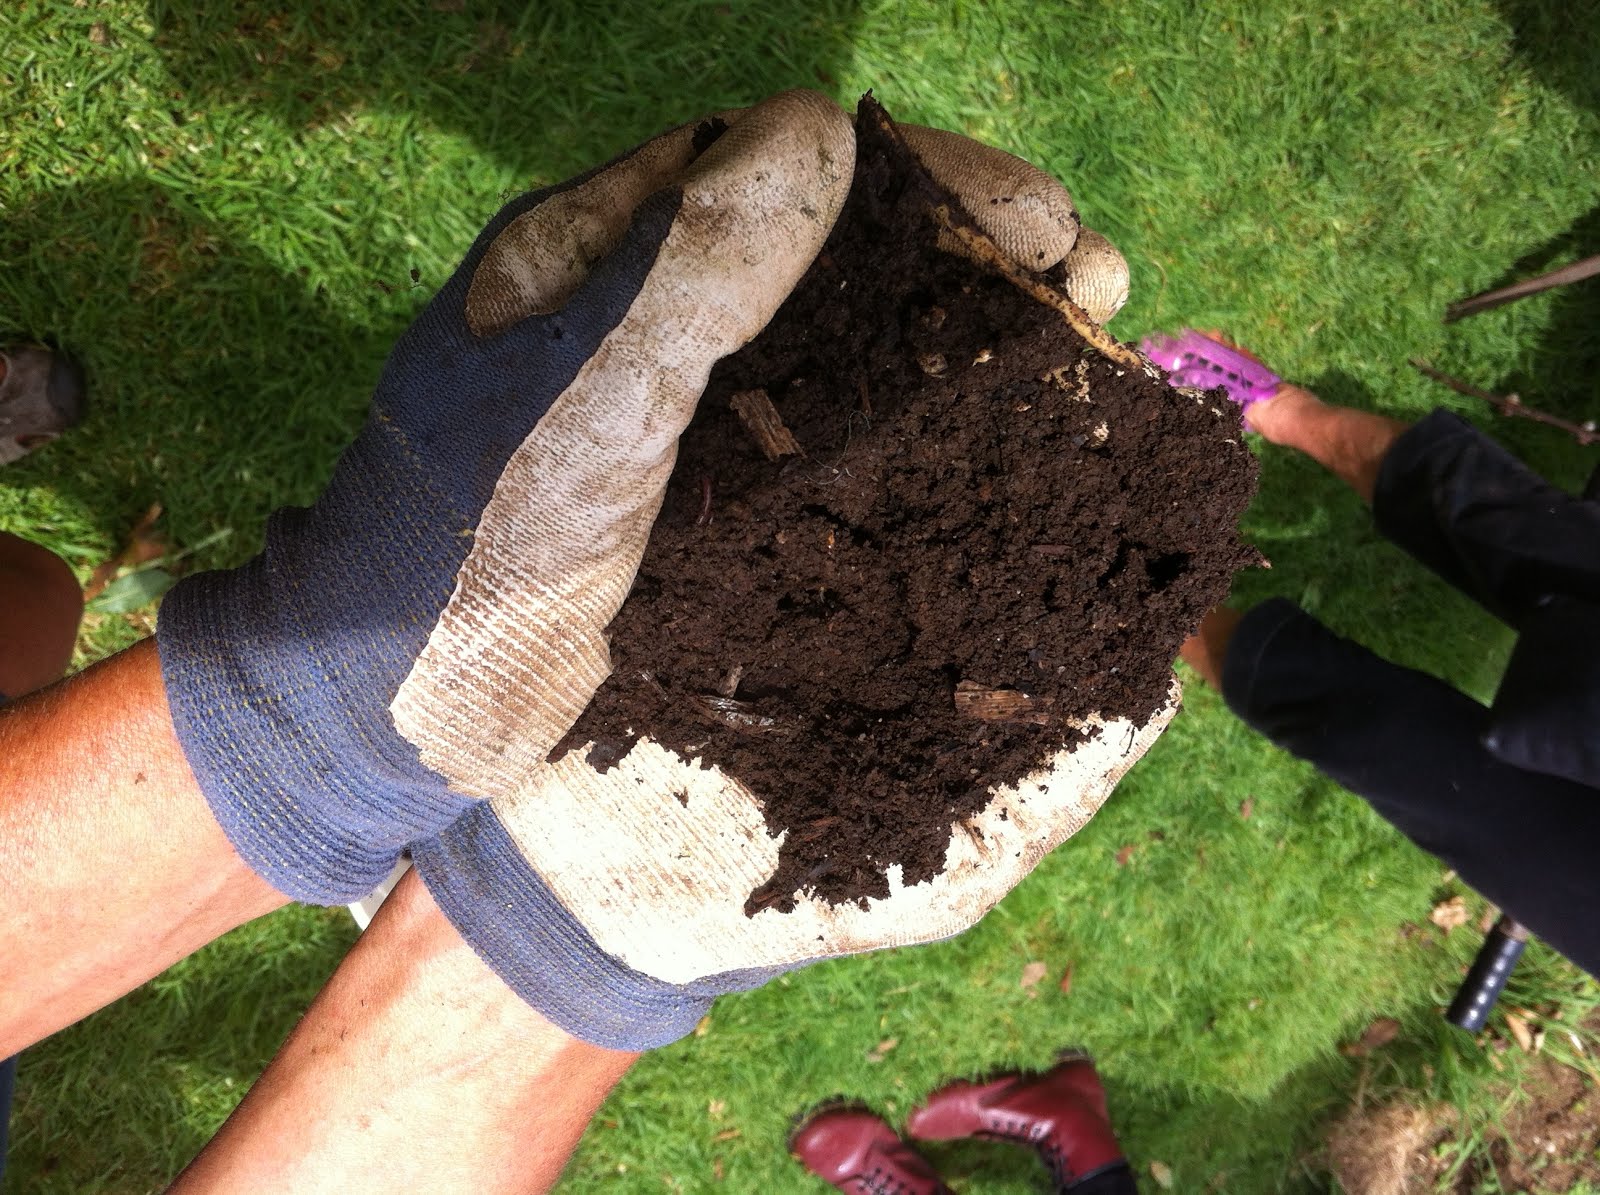
This is last months compost, already well broken down.


The standard minimum temperature to kill weeds and pathogens is 65 degrees celsius over 3 x days. The quality of our compost speaks for itself but Trevor informs me the new compost pile is already up to 75 degrees C!
Tomato blight or rust are able to be neutralised by composting. This is preferable to cutting them and leaving them as an uncomposted mulch on the ground because this can spread the disease.
Composting our organic waste helps to nurture the soil by building up its organic content. It is an invaluable resource for the gardens and should be dug into the soil and not used a mulch.
Finished compost smells sweet and will have a small and friable texture.
Thanks for your workshop Judy!


