Sunday, 28 February 2016

Aaron's cooking class

Aaron Brunet fellow gardener and handily, Masterchef NZ 2013 winner, gave us a cooking class today. Check out his book too....

Aaron started by discussing the rice our stir-fry tastings were to be eaten with. He had pre-cooked the rice as follows:
1 C basmati rice
1 and 1/2 C water
3/4 C coconut cream
salt as preferred
Aaron brings the water to the boil and then sprinkles the rice into it. Cover the pan, turn the heat down low and cook for 15 minutes. Then turn off the heat and leave the rice covered to sit for another 15 minutes.
Ginger could also be added to the rice water during cooking.

This pre-cooked rice was lightly stir fried in the wok over the gas burner.

Sliced peaches with fennel seeds and kumara tips.
Slice the firm fleshed peaches into irregular shapes.
Heat the wok until it is very hot - ideally on a big gas ring.

While the wok heats make a mixture of;
2 tsp-ish of cornflour
Cold water - about 1/3 C
Salt to taste
1 tsp-ish white balsamic vinegar
Taste the sauce and adjust to your palate.
This will be used to thicken any juices left in the wok at the end of the stir-frying and gives a beautiful glaze to the vegetables.

TIP: taste all of the ingredients whilst still raw to 'understand' them. If they taste good raw, they will taste good cooked - and vice versa.

The wok is ready when it starts to smoke and a drop of water dropped on it immediately sizzles into steam. It needs to be HOT.

Once the wok is hot, add a splash of oil - today Aaron used a blend of Rice bran and Canola oil - often he uses peanut oil. Next, the allotment grown fennel seeds were added whole. If there had been a mortar and pestle handy, these would have been roughly ground before they went in.

TIP: Grinding your own seeds, be they cumin, coriander or whatever, gives a more pungent and fresh flavour & is better than pre-ground spices.

Next add the kumara tips and a splash of water to steam the vegetables.


Add the roughly chopped peaches and stir to keep everything moving, so all surfaces touch the hot wok.
Sprinkle in salt and pepper to taste.
Add more water if necessary.
Stir the cornflour mixture, which will have settled and dribble in a little to create a bubbling liquid on the bottom of the wok. Cook until everything is glossy and shiny.
Serve immediately.

Pumpkin shoots and flowers.
TIP: Pumpkin tendrils can be harvested weekly as a green crop. This also helps the fruit (pumpkins) to set.

Heat the wok until it is HOT.
Add oil and the pumpkin shoots.


Add water as it cooks and stir.
Aaron then added some of our 'gourmet garlic' - unpeeled but roughly chopped.
Add extra oil if needed. You could also add ginger at this point if liked.
Add freshly ground black pepper.
You could also add 2 - 3 freshly ground star anise at this point if liked.


Add the pumpkin flowers - these were cut in half lengthways - beautiful!
Add a splash of soy sauce.
Add a dash of the cornflour mixture to thicken the juices.
It is ready once everything has wilted - so it's fast.
Adjust to suit your palate with seasoning - salt/soy.
Chop fresh basil leaves and scatter over to serve. We served ours in the green cast iron pan below.

TIP: Young baby pumpkins can also be sliced lengthways and added to a stir-fry. Furry pumpkin stalks can also be peeled and used as an ingredient.


Lambs Quarters and allotment harvest stirfry
Heat the wok until it is HOT.
Add oil and the chopped beans.


Add sliced baby corn.
Amaranth leaves
Chopped capsicum.
Drop in the lambs quarters leaves.
Add a finely chopped chilli
Salt.
Tear in basil leaves.
Add white balsamic vinegar.
Thicken with the cornflour mixture.

Aarons advice is to try things - experiment and discover. Build up your library of tastes. For example 'Gallant soldier' weed is actually quite delicious! (See below, tucked under the pumpkin tendrils, above the secateurs).

A big thank you to Aaron for a fun, interesting and informative session.

Saturday, 27 February 2016

Working Bee - Sunday Feb28th.

After a welcome gentle downpour on Saturday, our working bee morning broke fine and clear. It was to be a short work day as we had a treat - our Fellow gardener and Masterchef 2013 winner Aaron Brunet was to give us a cooking demonstration. (See the following blog for his creative and delicious ideas).

At this time of the year, there is a lot of work that needs doing in the Sanctuary gardens to stay on top of things as weeds go to seed, compost ingredients pile up, the harvests continue and so on. Here are a few pictures of our working bee today:

There is always compost to turn at the Sanctuary garden as we recycle our 'waste' material into beautiful compost to enrich and nurture our precious soil.

Mike, Riley and Stephanie clear Twitch from the pathway.

Liz's beautiful Garlic chive border in the herb garden - so elegant.
Garlic chives can be used similarly to regular chives and add a garlic flavour and aroma to food.

John and Helen with some of Johns beautiful lettuces - brimming with nutrients and flavour.

John tends his magnificent garden. He tells me that he's now sowing seeds in the glasshouse of fennel and spinach for the next succession of planting.
Sarah shows the convolvulus who's in charge as she clears it from the mountain pawpaw.
Christine, Rosie and Jan clear the noxious weeds from the edge of the food forest. The whole food forest area is transforming into a beautiful parkland area from its original overgrown and neglected condition. Inspirational what many hands can do when working together.

And below are some of the rest of our hard working members from todays working bee (at Aarons masterclass). It was another great turnout with loads of tasks completed.


Monday, 18 January 2016

Judy's compost workshop at Working Bee - Sunday 17 January, 2016

We are lucky at the Sanctuary gardens for so many things including our wonderful compost bins, our ongoing supply of compostable waste and a great work ethic amongst our members whereby we produce beautiful compost to enrich and feed the soil.

Judy from the 'Compost Collective' and also a fellow allotment gardener, gave a workshop on compost making at our last working bee.

Compost is made by layering 'Brown/Dry' organic material with 'Green/Wet' organic material, ideally a 70% brown to 30% green ratio.

Activators are also added and these provide Potassium to the compost. Some examples of Activators are:
untreated wood ash,
blood and bone,
Comfrey,
Nettles,
Rock dust
Finished compost can also be used.
Urine - yep, you can pee on your pile!

Examples of 'Brown/Dry' organic materials are;
autumn leaves,
shredded paper including those annoying junk mail flyers(!),
newspaper,
untreated sawdust,
hay and straw.

Examples of 'Green/Wet' organic materials are;
manure,
grass clippings,
food scraps,
coffee grounds,
tree prunings,
seaweed,

Many people will struggle to achieve the 70/30 ratio so a 50/50 ratio is acceptable, although more 'Brown/Dry' will give a better compost. It's also possible to dry 'Greens' to create more 'Brown/Dry'

Recipe.
Soak cardboard boxes in water - 'Brown/Dry' organic material.


Leaves - 'Brown/Dry' organic material.


Coffee grounds 'Green/Wet' organic material - from our friendly Cafe


And all of our organic weeds, pruning etc. in the collection bay.
NB All noxious weeds have already been separated and put into black bags to rot down (see Noxious weeds blog).


VJ and John turn the compost pile, started at our December working bee, to free up the bin for our new pile.


The bin is ready to begin - Pete clears the last bits.


Firstly, a layer of sticks that are cut up so they'll compost readily. These are used to line the base of the pile to increase aeration.


Layer 1 is 'Brown/Dry' (carbon). This also helps with the aeration. Aaron loads it in.


Tear the cardboard into small strips to aid decomposition. Moisten with the hose as it goes in.


Layer 2 is 'Green/Wet'.


Chop up any big stems and roots up with loppers or a spade as it is layered in to speed up the composting process.


A sharp spade really cuts through - another reason to keep tools in good condition.


Layer 3 "Brown/Dry'.
Fluff up shredded newspaper as it goes in to avoid clumping once it is wet with the hose.


Moisten the 'Brown/Dry' Layer


Layer 4 - Activator. We used Comfrey. The pile was levelled as the organic material was added, to encourage even decomposition.


Level 5 - more 'Green/Wet'. Remember the ideal 70/30 ratio.
 

Level 6 'Brown/Dry'.
Remove any plastic tape or non-biodegradable material from the boxes before they go on the pile. Then wet it down.


Level 7 Activator - more comfrey

Level 8 'Green/Wet' - we have plenty!
We also added used coffee grounds to this layer.


Level 9 'Brown/Dry' and again we moisten it.
Level 10 Activator.
Activators can be put in at any stage if available. We added Stinging Nettles this time as they are rich in Silica. Keep wetting the pile.


Layer 11 'Brown/Dry'.
We used the potato tops that had wilted in the sack since the December working Bee, along with wetted cardboard. We continued to chop up all sticks, stems and stalks to speed up the composting process. We kept the pile flat and even in height as we worked and used the entire footprint of the compost bin.


Layer 12  - you guessed it - 'Green/Wet'.
Layer 13 Activator.
We used a bucket full of finished compost from an earlier pile this time.

To finish;
Top with a layer of "Brown/Dry and then cover the top with old carpets or sacks and wet-down again. The covers will help to retain moisture and warmth.
The compost should be turned regularly and if dry, add water. If it's wet, add dry material.
Our compost is turned each working bee (monthly).
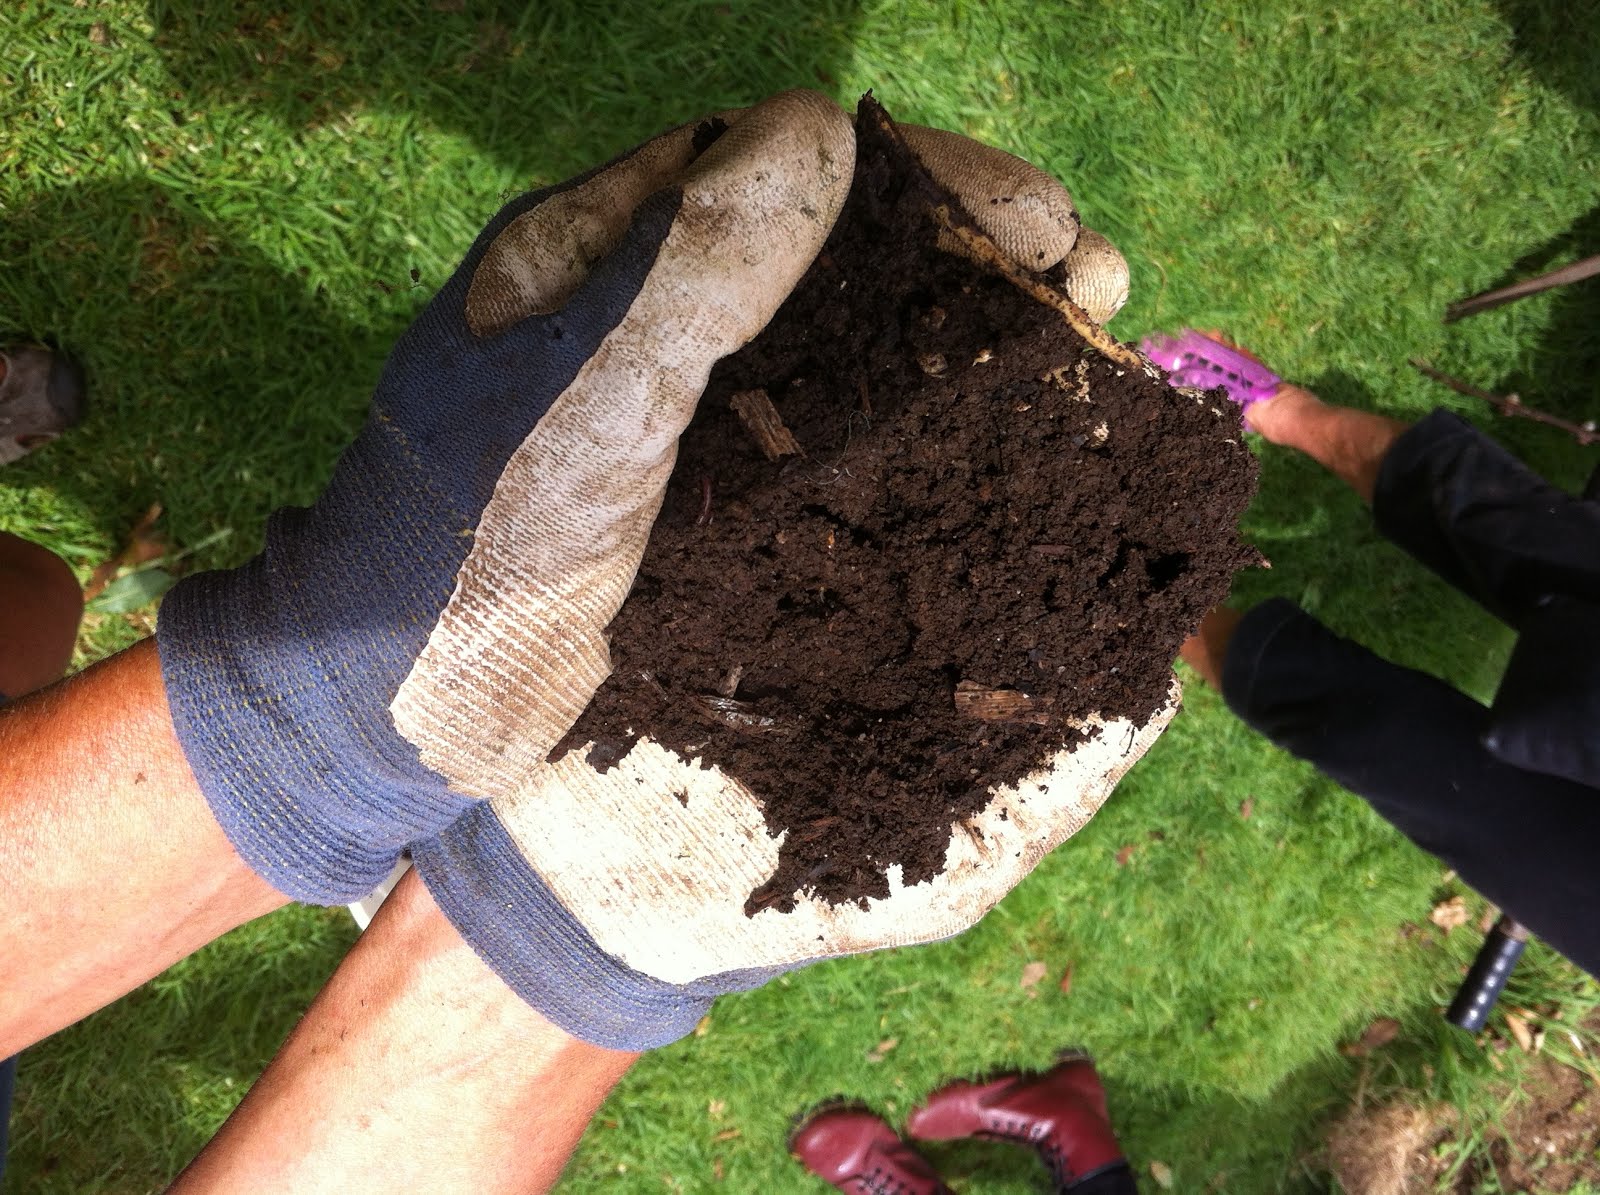
This is last months compost, already well broken down.
 

The standard minimum temperature to kill weeds and pathogens is 65 degrees celsius over 3 x days. The quality of our compost speaks for itself but Trevor informs me the new compost pile is already up to 75 degrees C!


Tomato blight or rust are able to be neutralised by composting. This is preferable to cutting them and leaving them as an uncomposted mulch on the ground because this can spread the disease.

Composting our organic waste helps to nurture the soil by building up its organic content. It is an invaluable resource for the gardens and should be dug into the soil and not used a mulch.
Finished compost smells sweet and will have a small and friable texture.

Thanks for your workshop Judy!

Saturday, 16 January 2016

Sanctuary Woking Bee - Sunday

Happy New Year everyone.
Once again the weather was kind for our working Bee - our first for 2016.  It was an informative morning with a talk about noxious weeds and their disposal/recycling, followed by a hands-on demonstration of compost making by our Allotment holder Judy from 'The Compost Collective'.

Noxious weeds.
There are a few weeds that require special attention within the Sanctuary Gardens. Most others are fine to go into the compost but these need to be kept separated to avoid the spread these invasive weeds.

1. Kikuyu Grass.
 
This is a very invasive plant that will easily smother small bushes and other plants. It needs to be put into Black Bags for 4 - 6 months to break down. After this time, it can be used as a mulch within the food forest.

2. Tradescantia a.k.a. Wandering Willy & other common names.

Likes a shady and moist habitat. It is important to remove every last piece of Tradescantia when weeding and to ensure none is dropped as it will grow vigorously from any remaining stems or leaves. It needs at least 3 or 4 weeding sessions to successfully eradicate. Put into Black Bags for 4 - 6 months to break down.

3. Convolvulus
 
A climbing creeper that will easily overwhelm other plants. It breaks off easily but the roots need to be dug out to successfully remove it. Often the roots will travel a long way back to the main rootstock underground and this should be dug out. Put into Black Bags for 4 - 6 months to break down.

4. Hemlock
 
This is a poisonous plant so needs special care. Put it into the plastic wheelie bins by the shed for disposal. This is one of the few plants that we do not recycle at the Sanctuary.

5. Oxalis

Has clover like leaves and different coloured flowers including white, pink and yellow. It spreads via its bulbs and is difficult to get rid of. If pulled, the leaves will come away easily but the bulbs will remain behind to grow again. They need to be dug out. Please put the entire plant, paying particular attention to collecting all of the bulbs, into Black Bags for 4 - 6 months to break down.

6. Moth plant

Has white flowers and milky sap. This also needs to go into the plastic wheelie bins by the shed for disposal. This is another of the few plants that we do not recycle at the Sanctuary.

7. Mint

Grows similarly to Kikuyu by sending out long runners and gradually colonising an area. The runners and the roots need to be dug out and then put into Black Bags for 4 - 6 months to break down. The leaves can be dried for making Mint tea or adding to Yogurt for a refreshing dip.

8. Dock

Dig deeply to remove the entire taproot of the Dock. Use a spade to do this and remove before the seedheads set or gather all the seeds and put into Black Bags for 4 - 6 months to break down.

9. Titch grass or Couch


Horrible stuff! Grows on underground runners and needs to be dug out completely to remove successfully as it will grow from every node on the stem and roots. If allowed to establish it will invade.

10. False Tumeric plant

Grows from rhizomes and needs to be dug out and put into Black Bags for 4 - 6 months to break down.


When weeding your plot, please separate the noxious weeds from the rest of your weeds. The plastic wheelie bins and black bags are only for the noxious weeds, as all of the others can go into the compost to build up our soil. 
Ensure the bags are tied off securely and leave in a sunny spot to decompose. If the bags are not tied off securely the weeds will regrow.


Also please ensure that minimal soil (to reduce the weight, better to keep it in the garden) and no sticks or sharp objects go into the black bags as they can puncture the bags.

Partially decomposed noxious weeds


Once the bags have sat for anything up to a year, the decomposed material is then sorted to check that nothing is still viable or growing and it is put around the trees in the food forest as a nutritious mulch.